
Based on my experience hosting and participating in online meetings, I often encounter inconveniences or discomfort unrelated to the meeting software itself. Here are some typical issues:
- Fear of accidental exposure: As a listener, you might accidentally unmute or even turn on your camera, leading to embarrassing situations.
- Difficulty recording meetings as a non-host: Non-hosts can only use third-party screen recording software to record the meeting window, which cannot directly capture meeting audio.
- Unavailable PowerPoint presenter view: The presenter view is shared during screen sharing and cannot be hidden.
I’ve found some simple solutions to these problems, so this article will introduce how to solve or alleviate them.
Fear of Accidental Exposure
Download the Mic Drop app. Once installed, you can easily toggle the mute/unmute status from the system status bar. When set to mute, all apps on the system are unable to access the microphone, effectively disabling it at the system level. This eliminates the risk of accidentally unmuting or the host unmuting you, allowing you to relax and focus on other tasks.
Note: After the meeting ends, I recommend immediately setting the microphone to unmute before exiting Mic Drop. If you exit Mic Drop while the microphone is muted, it won’t automatically re-enable, and you might struggle to troubleshoot microphone issues during your next meeting. Additionally, system-level microphone disabling affects not only the built-in microphone but also AirPods microphones and other connected microphone devices, which might impact other functionalities.
As for camera issues, purchasing a “camera cover” solves the problem. However, note that MacBook devices have minimal space between the screen and keyboard when closed, so choose a thin, residue-free cover to avoid damaging your computer.
Recording Meetings as a Non-Host
Screen Recording
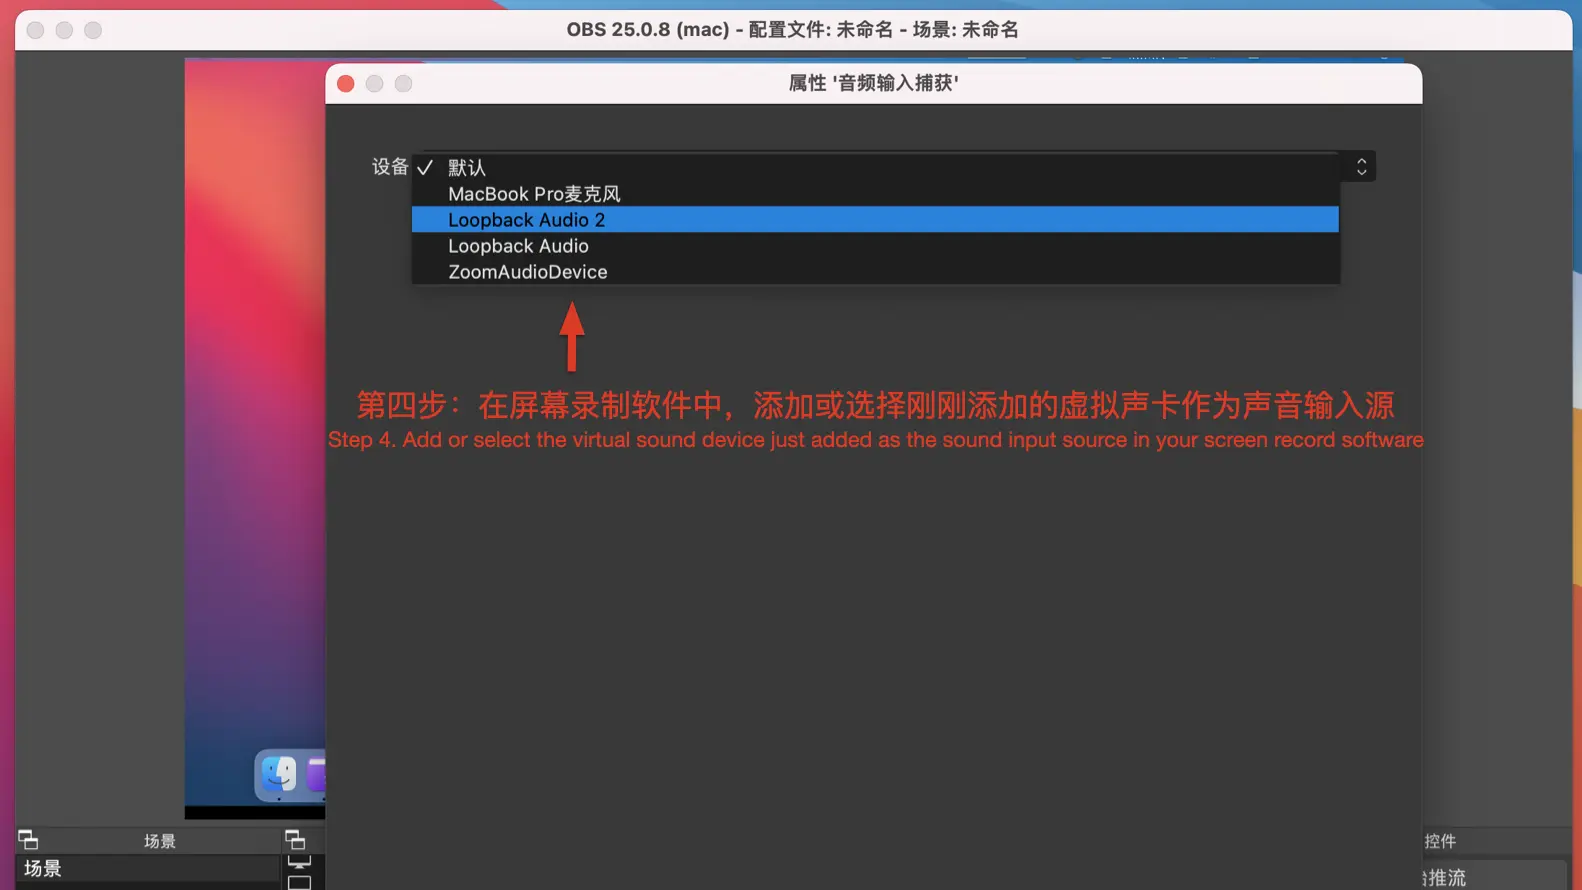
The most commonly used screen recording software is OBS Studio. However, OBS can only capture your microphone audio and not the meeting audio, leaving you with just the meeting visuals, which is frustrating. I’ll address this issue later, but first, let’s discuss two other screen recording software options.
On macOS, you can use the built-in QuickTime Player (QTP). Open it and select “File > New Screen Recording” from the menu bar to start recording. Like OBS, QTP allows you to specify the screen capture area or capture a specific app window, which is very convenient. In tests, QTP records 60 FPS original-quality videos by default, producing high-quality footage. However, QTP’s drawback is the inability to modify recording specifications, resulting in large video files that grow at a rate of 2–5 MB/s during recording.
Personally, I often use Camtasia, a video editing software specializing in “screen recording material editing.” After recording, Camtasia automatically adds the video file to its media library for easy post-production. Camtasia’s standout feature is its ability to capture system audio (it includes an audio extension plugin). Before recording, simply enable “System Audio.” However, during my use of Camtasia 2020, I found it doesn’t support capturing specific windows like OBS or QTP, only allowing screen capture areas, which is a significant drawback.
Capturing Meeting Audio
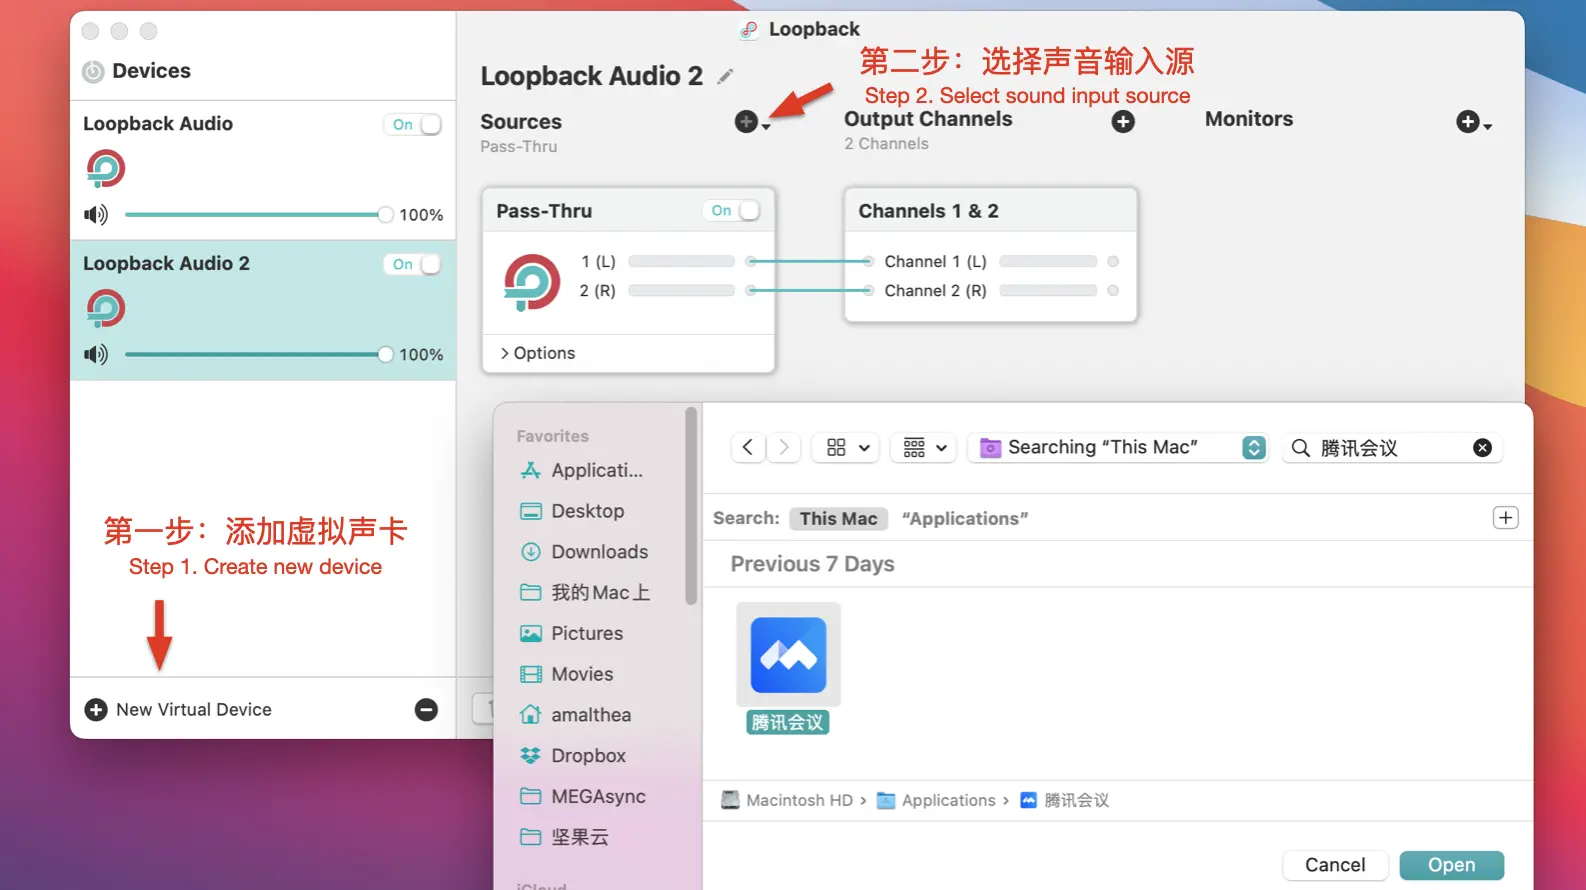
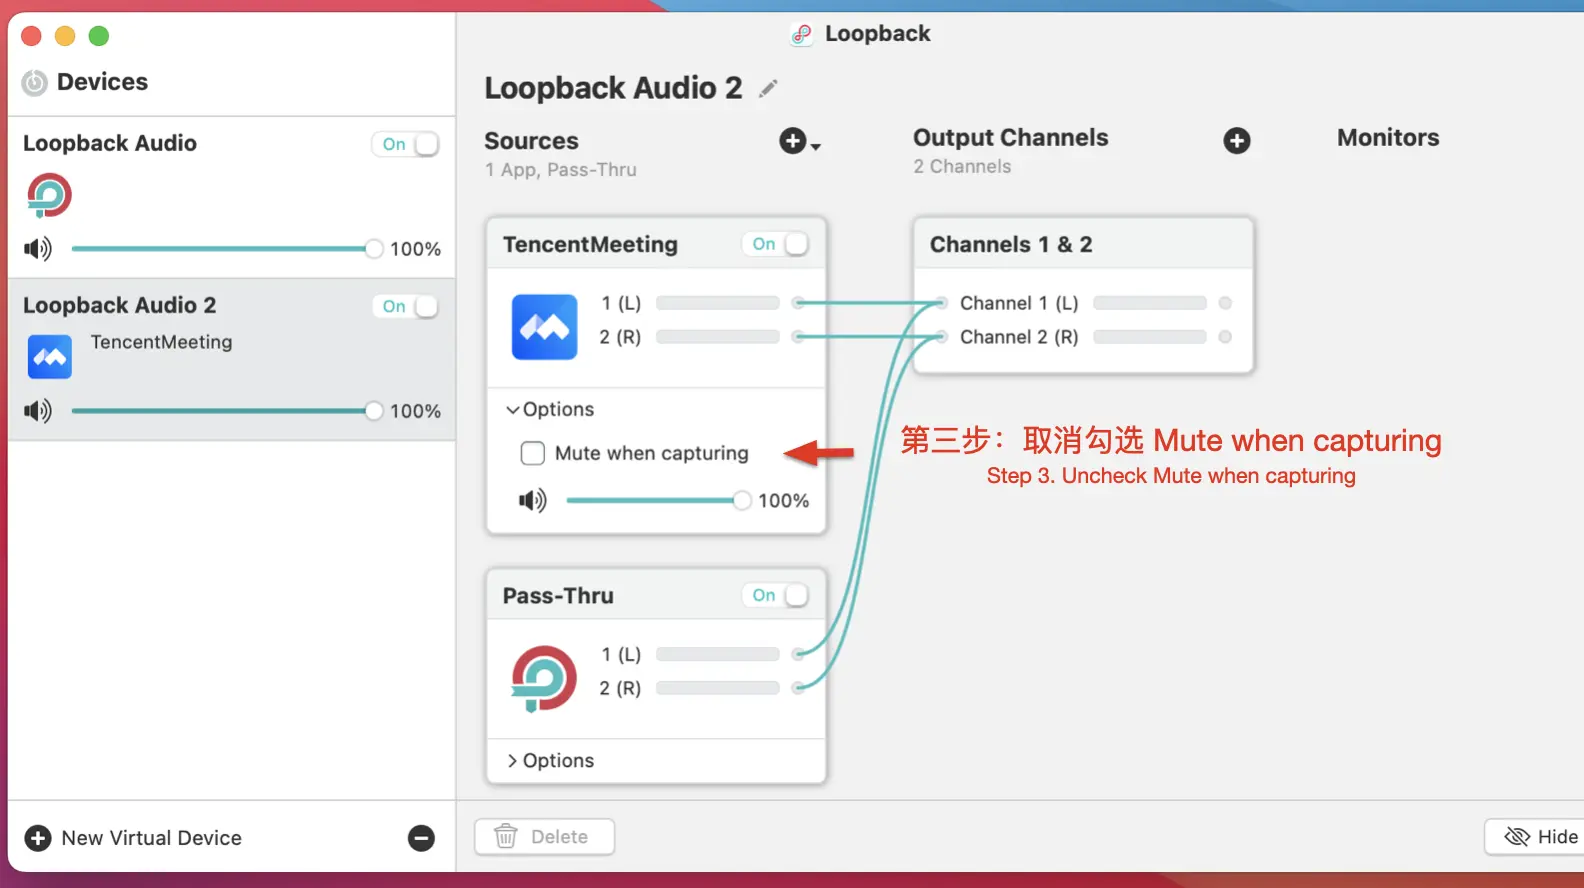
Returning to the issue of capturing meeting audio, if you don’t purchase Camtasia, you’ll need to use OBS or QTP along with additional audio management software to create a “virtual audio device.” This process is straightforward.
Download Loopback, a powerful audio routing tool. Here, we’ll use it to convert “audio output from a meeting app” into “output from a virtual audio device,” then configure the screen recording software to capture the virtual audio device. The setup process is simple, as shown below.
PowerPoint Presenter View
Online methods generally suggest “opening presenter view first, then sharing the window.” In my tests, this method didn’t work for me. I’m unsure whether the method itself is flawed, doesn’t work on macOS meeting apps, or is specific to my computer. Using this method on DingTalk and Tencent Meeting, I couldn’t hide the presenter view, and the live shared screen froze. Currently, I haven’t found a direct solution to this issue.
The compromise is to use a secondary screen. When PowerPoint presenter view is enabled, the presentation view and presenter view automatically split across two screens, and you can swap the displays via right-click.
If you have an iPad (running iPadOS 13 or later), you can use the Sidecar feature to turn your iPad into a secondary screen for your Mac (running macOS 10.15 or later). Then share the secondary screen’s content, allowing you to comfortably read your notes. This is the method I currently use.